To add a digital signature to your Word document, you’ll need to have followed the above instructions and inserted a signature line first.
You’ll also need to install a security certificate for your signature. If you don’t have one, Word will ask you if you’d like to acquire one from a “Microsoft Partner” like GlobalSign.
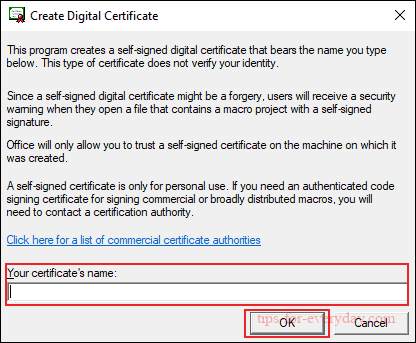
As an alternative, you can create your own digital certificate using the“Selfcert”tool, included in your Microsoft Office installation folder.
Find “Selfcert.exe” in your Office installation folder and double-click it to open it.
In the Selfcert tool, type a name for your security certificate in the “Your Certificate Name” box and then click “OK” to create it.

Once you have a digital certificate installed, return to your Word document and double-click on your signature line.
In the “Sign” box that appears, type your name or click “Select Image” to insert a picture of your handwritten signature.
Click “Sign” to insert your digital signature into the Word document.
Once signed, Word will confirm that the signature has been added.
If you edit the document after signing it, the digital signature will become invalid, and you’ll need to sign it again.
